Region configuration#
The Region Configuration Dialog providea an interface to configure the properties of a region of interest (ROI) or an annotation object (region for short hereafter). You can access the dialog by double-clicking on a region entry in the Region List Widget or by double-clicking on a region in the Image Viewer Widget.
The dialog contains a “Configuration” tab and a “Styling” tab. The “Configuration” tab allows you to modify the properties of the region such as name and geometry. The “Styling” tab allows you to customize the appearance of the rendered region in the Image Viewer Widget.
The actual context in the two tabs depends on the type of the region or annotation.

Using the buttons at the bottom of the dialog, you can also lock/unlock the region, hide/show the region, center the region in the image viewer, export the region as a region file, or delete the region.
When there are multiple regions selected, the Region Configuration Dialog will show the common properties of the selected regions. Modifying a common property will apply to all selected regions. For example, if you select two regions with different colors and then change the color in the Region Configuration Dialog, both regions will be updated to have the same new color.
Coordinate systems#
The Region Configuration Dialog supports two major coordinate systems: world coordinates and image coordinates. The coordinate system can be selected with the “Coordinate” radio button and the dropdown menu in the “Configuration” tab. Auxiliary information about the other coordinate system is also displayed in the dialog.
The supported coordinate systems are:
Auto: using the header information of the image to determine the coordinate system. This is the default option.
ICRS
FK5
FK4
Galactic
Ecliptic
Image coordinates
When the reference system is changed in the Region Configuration Dialog, the coordinate system in the image viewer will be updated accordingly.
Note
The title of the Region Configuration Dialog contains the name of the spatial reference image. All the region properties are referenced to the spatial reference image and shared to all other matched images.
Warning
If an image has visible projection distortions, the displayed “size” or “length” property of a region or an annotation object may not be accurate. The displayed number is based on the angular size of the reference pixel as defined in the image header and assumes it is fixed across the image. The only exception is the “ruler” annotation object which applies the geodesic calculation to measure the distance between two points on the image.
Distance measurement tool#
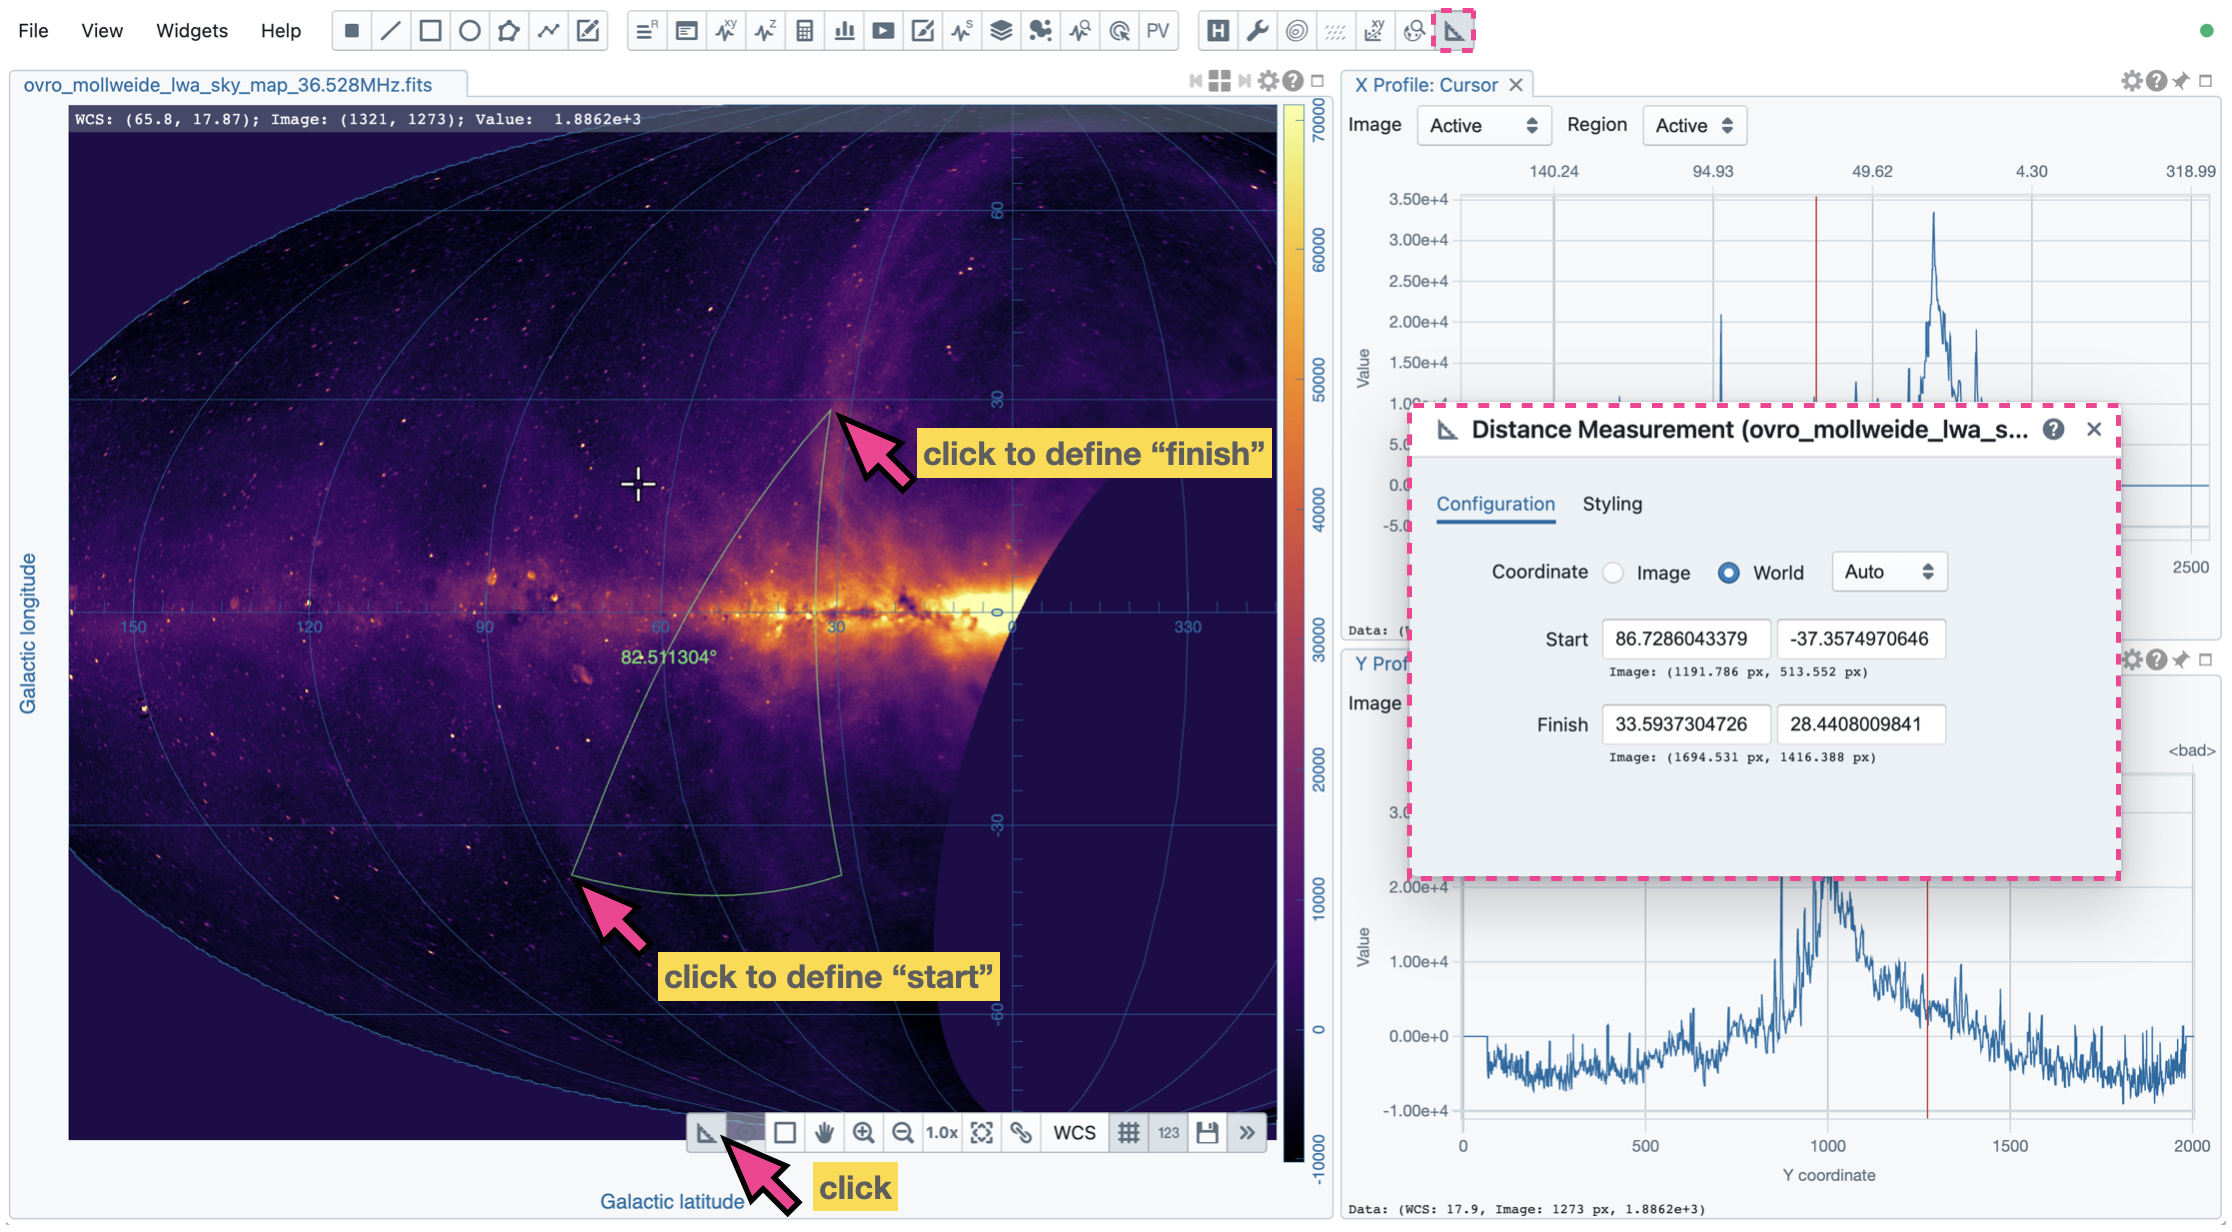
The “ruler” annotation object in CARTA is used to measure the geodesic distance between two points on an image. This is particularly useful for astronomical images where the distance between celestial objects needs to be measured accurately. A shortcut button is available in the toolbar of the Image Viewer Widget to activate a distance measurement, effectively creating a “ruler” annotation object.
The two points are defined by a pair of clicks in the Image Viewer Widget. Alternatively, you can use the Region Configuration Dialog to define the two points by entering their coordinates in the “Configuration” tab.
The result is visualized on the image, including the iso-longitude and iso-latitude geodesic lines. The appearance of the rendered geodesic lines can be customized in the “Styling” tab of the Region Configuration Dialog.