Installation and configuration
CARTA is fundamentally a web application and utilizes a client-server architecture. There are three main components:
- carta_backend
- carta_frontend
- carta-controller
The “carta_backend” focuses on computations of image data for visualization at the client side. Usually the “carta_backend” is run on a powerful server or cluster with high-speed storage where users’ data reside. The “carta_frontend” receives the data from the server side and utilizes web technologies to render the data for users. The “carta_frontend” also serves as the graphical user interface (GUI) for users to interact with the CARTA application. The “carta-controller” is a key component to handle the lifetime of a “carta_backend” process and the authentication of user login. Once the three components are configured properly, users will just need to visit a dedicated CARTA URL and login with credentials. Then, the GUI should be loaded and ready for use. This is called the “Site Deployment Mode”. Mostly it is suitable for institution-wide deployment for groups of users by a system administrator.
Alternatively, the “carta_backend” and the “carta_frontend” can be run on the same computer or on two different computers without the “carta-controller”. It is up to the users to execute the “carta_backend” on a computer where the image data reside and connect to it with a web browser. Traditionally, the common use case is a user connects to a remote server via the ssh protocol and displays applications through X11 tunneling, or via VNC. The architectural design of CARTA is to avoid these less efficient ways of interacting with image data. Instead, users should use their local web browser (not a web browser in the VNC environment) to connect to the “carta_backend” running on a remote server which is accessed via the ssh protocol. This is called the “User Deployment Mode”. It is up to the users to install CARTA on a desired computer and run it manually.
The supported operating systems of the two modes are summarized below.
- Site Deployment Mode
- Ubuntu Linux 18.04 LTS (Bionic Beaver), 20.04 LTS (Focal Fossa), and 22.04 LTS (Jammy Jellyfish)
- User Deployment Mode
- Ubuntu Linux: 18.04 LTS (Bionic Beaver), 20.04 LTS (Focal Fossa), and 22.04 LTS (Jammy Jellyfish)
- Red Hat Enterprise Linux: 7, 8
- CentOS: 7
- AlmaLinux/Rocky Linux: 8
- macOS: 10.15 (Catalina), 11 (Big Sur), and 12 (Monterey)
Note
CARTA may work on other Linux distributions (e.g., Fedora, Debian, etc), but has not been tested by the CARTA development team.
In the following two sections, we provide the installation instructions for the two deployment modes. System administrators who wish to deploy CARTA institution-wide, please refer to the section Site Deployment Mode. For general users, please refer to the section User Deployment Mode.
Site Deployment Mode
The Site Deployment Mode supports the following operating systems:
- Ubuntu 18.04 LTS (Bionic Beaver), 20.04 LTS (Focal Fossa), and 22.04 LTS (Jammy Jellyfish)
To deploy CARTA at your institution as a web-based application for multiple users, please refer to the CARTA controller documentation. Detailed instructions on installation and configuration of the “carta_backend”, the “carta_frontend”, and the “carta-controller” are provided. If there is a problem, please contact the CARTA helpdesk.
User Deployment Mode
The User Deployment Mode supports the following operating systems:
- Ubuntu Linux: 18.04 LTS (Bionic Beaver), 20.04 LTS (Focal Fossa), and 22.04 LTS (Jammy Jellyfish)
- Red Hat Enterprise Linux: 7, 8
- CentOS: 7
- AlmaLinux 8
- Rocky Linux 8
- macOS: 10.15 (Catalina), 11 (Big Sur), and 12 (Monterey)
If you have root access and can use a package manager to install CARTA via commandline, please refer to the section Installation via package managers. Otherwise, please refer to the section Installation of the stand-alone application (direct download).
Installation via package managers
CARTA can be installed via commandline with package managers such as:
yumordnfon Red Hat Enterprise Linux, CentOS, AlmaLinux, and Rocky Linuxapton Ubuntu Linuxbrewon macOS
Please identify your operating system where you wish to run CARTA and follow the instructions. If there is a problem, please contact the CARTA helpdesk.
Ubuntu
Ubuntu 18.04, 20.04, and 22.04 packages are available from our PPA. Please note that root access is required, unless you install in a Docker container.
sudo add-apt-repository ppa:cartavis-team/carta
sudo apt-get update
sudo apt install carta
Please refer to the section How to run CARTA? for different single-user use cases.
Note
For the Windows 10 users, you can install CARTA on the Ubuntu subsystem.
CentOS 7
For CentOS 7 users, the “cartavis/carta Copr” and “EPEL” repositories must be added. Please note that root access is required, unless using a Docker container.
sudo yum -y install yum-plugin-copr
sudo yum -y copr enable cartavis/carta
sudo yum -y install epel-release
sudo yum -y install carta
Please refer to the section How to run CARTA? for different single-user use cases.
AlmaLinux 8 / Rocky Linux 8
For AlmaLinux 8 / Rocky Linux 8 users, the “cartavis/carta Copr” and “EPEL” repositories must be added. Please note that root access is required, unless using a Docker container.
sudo dnf -y install 'dnf-command(copr)'
sudo dnf -y copr enable cartavis/carta
sudo dnf -y install epel-release
sudo dnf -y install carta
Please refer to the section How to run CARTA? for different single-user use cases.
Red Hat Enterprise Linux 7
For Red Hat Enterprise Linux 7 users, the “cartavis/carta Copr” and “EPEL” repositories must be added. Please note that root access is required, unless using a Docker container.
sudo bash -c 'echo -e "\
[copr:copr.fedorainfracloud.org:cartavis:carta]\n\
name=Copr repo for carta owned by cartavis\n\
baseurl=https://download.copr.fedorainfracloud.org/results/cartavis/carta/epel-7-x86_64/\n\
type=rpm-md\n\
skip_if_unavailable=True\n\
gpgcheck=1\n\
gpgkey=https://download.copr.fedorainfracloud.org/results/cartavis/carta/pubkey.gpg\n\
repo_gpgcheck=0\n\
enabled=1\n\
enabled_metadata=1" > /etc/yum.repos.d/carta.repo'
sudo rpm -ivh https://dl.fedoraproject.org/pub/epel/epel-release-latest-7.noarch.rpm
sudo yum -y install carta
Please refer to the section How to run CARTA? for different single-user use cases.
Red Hat Enterprise Linux 8
For Red Hat Enterprise Linux 8 users, the “cartavis/carta Copr” and “EPEL” repositories must be added. Please note that root access is required, unless using a Docker container.
sudo dnf -y install 'dnf-command(copr)'
sudo dnf -y copr enable cartavis/carta
sudo rpm -ivh https://dl.fedoraproject.org/pub/epel/epel-release-latest-8.noarch.rpm
sudo dnf -y install carta
Please refer to the section How to run CARTA? for different single-user use cases.
Note
If you have previously used our “packages.cartavis.org” RPM repository, we recommend uninstalling all CARTA releated RPMs and deleting the old repo file first e.g.
sudo yum -y remove carta
sudo rm /etc/yum.repos.d/cartavis.repo
macOS
We officially support macOS 10.15 Catalina, macOS 11.0 Big Sur, and macOS 12 Monterey through Homebrew. If you do not already have it, you may install Homebrew using the following command (root access is required):
/bin/bash -c "$(curl -fsSL https://raw.githubusercontent.com/Homebrew/install/HEAD/install.sh)"
Now CARTA can be installed with:
brew install cartavis/tap/carta
Installation of the stand-alone application (direct download)
If you do not have root access and cannot use package managers to install CARTA via the commandline, here we provide alternative solutions.
Linux AppImage
The Linux AppImage does not require root access. It can be run with:
- Ubuntu 18.04 (LTS), 20.04 (LTS), and 22.04 (LTS)
- Red Hat Enterprise Linux 7 and 8
- CentOS 7
- AlmaLinux 8
- Rocky Linux 8
You can simply download, extract, and run it.
We now support x86_64 and aarch64 architectures. You can download the x86_64 version via https://github.com/CARTAvis/carta/releases/download/v3.0.0/carta.AppImage.x86_64.tgz or the aarch64 version via https://github.com/CARTAvis/carta/releases/download/v3.0.0/carta.AppImage.aarch64.tgz. Alternatively, you can use the commandline. For example, to get the x86_64 version:
wget https://github.com/CARTAvis/carta/releases/download/v3.0.0/carta.AppImage.x86_64.tgz
tar -xzf carta.AppImage.x86_64.tgz
Then it will extract to carta-v3.0-x86_64.AppImage.
Please refer to the section How to run CARTA? for different single-user use cases.
macOS Electron Desktop
The Intel macOS Electron Desktop version can be downloaded via https://github.com/CARTAvis/carta/releases/download/v3.0.0/CARTA-v3.0-Intel.dmg and the native M1/M2-series macOS Electron Desktop version for new Apple Silicon Macs can be downloaded via https://github.com/CARTAvis/carta/releases/download/v3.0.0/CARTA-v3.0-M1.dmg.
After downloading, open the DMG installer and drag-and-drop the CARTA icon to the Applications folder.
Note
You may create an alias for starting the CARTA Electron version through your terminal. To do so, please open your “~/.zshrc” file (or “~/.bashrc” if you use bash) in a text editor and add the following line:
alias carta='/Applications/CARTA.app/Contents/MacOS/CARTA'
You may use a different alias rather than ‘carta’ e.g. ‘carta-v3.0’ or ‘carta-electron’.
Please refer to the section How to run CARTA? for different single-user use cases.
How to run CARTA?
There are different ways of running CARTA in your working environment. Please identify the following use cases and follow the instructions accordingly.
- CARTA is installed in the “Site Deployment Mode” by my system administrator at my institute: Site Deployment Mode: connecting CARTA.
- CARTA is installed in the “User Deployment Mode”, and I would like to run CARTA on a remote server: User Deployment Mode: running CARTA on a remote server
- CARTA is installed in the “User Deployment Mode”, and I would like to run CARTA on a local computer: User Deployment Mode: running CARTA on a local computer
Please note that the CARTA GUI is run in the web browser environment. The supported browsers are:
- Google Chrome (tested with v104)
- Firefox (tested with v103)
- Safari (tested with v15.5)
Other browsers may work but they are not tested.
Note
CARTA requires WebGL2 in order to render images properly. Please ensure WebGL2 is supported in your browser. You can verify your browser with https://webglreport.com/?v=2.
Site Deployment Mode: connecting CARTA
If your institute has CARTA deployed for multiple users, you should have a dedicated URL to access CARTA (please check with your system administrator). What you need to do is to access the URL with your favourite browser and you should see a dashboard similar to the following.
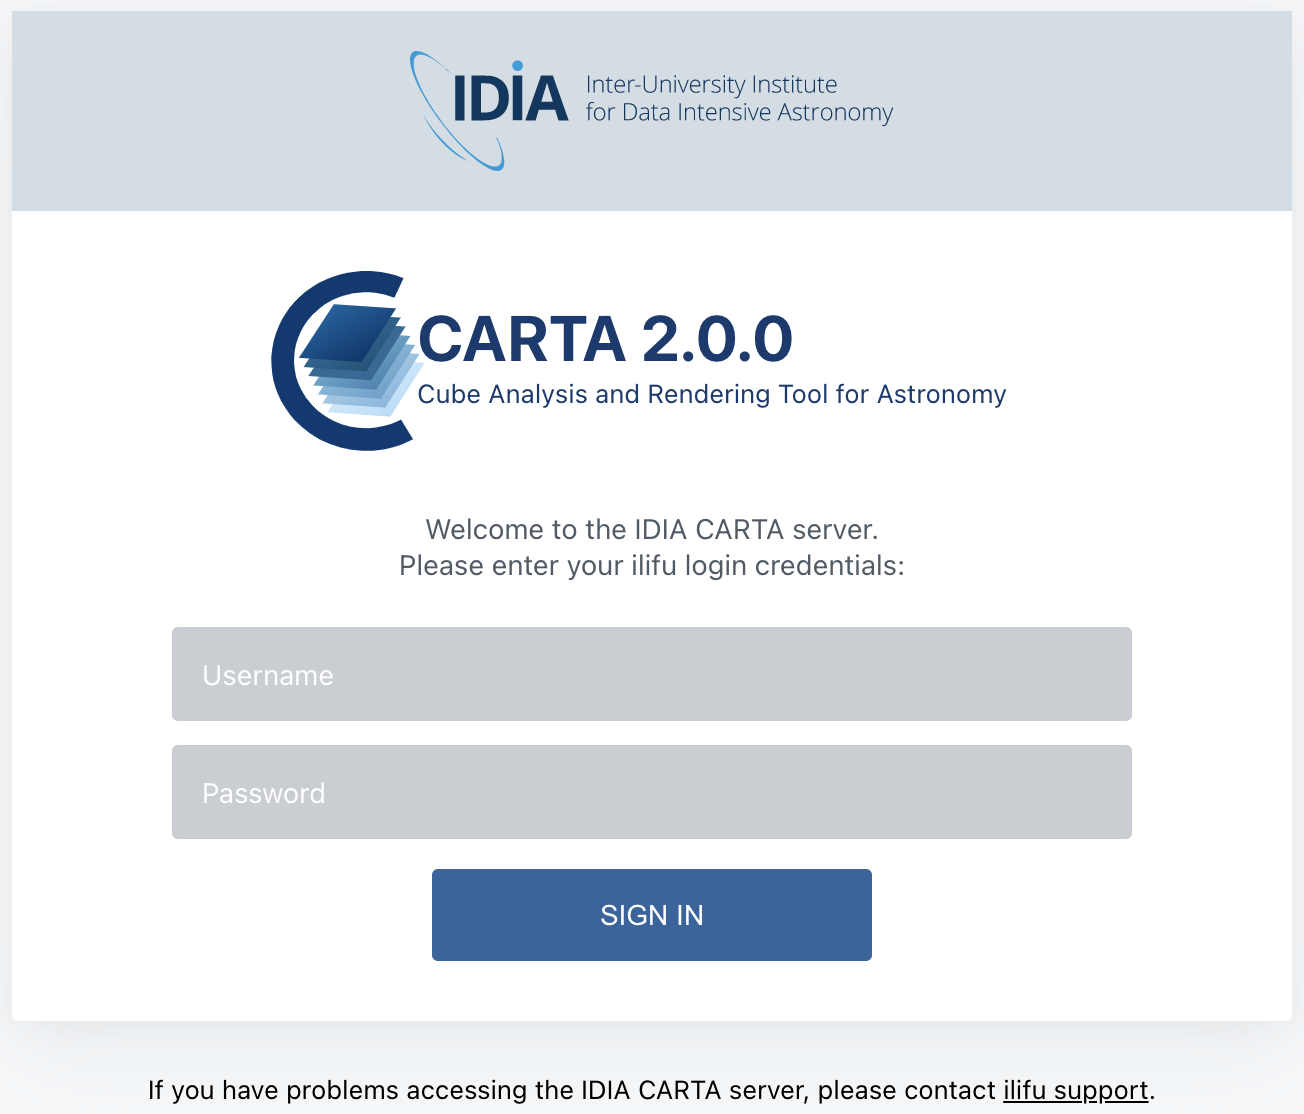
Note
When you are already authorized, you may not see the login page when you access the CARTA URL. Instead, the CARTA GUI should just appear and be ready for use.
After you provide your credentials, you should see the CARTA GUI directly and it is ready to use.
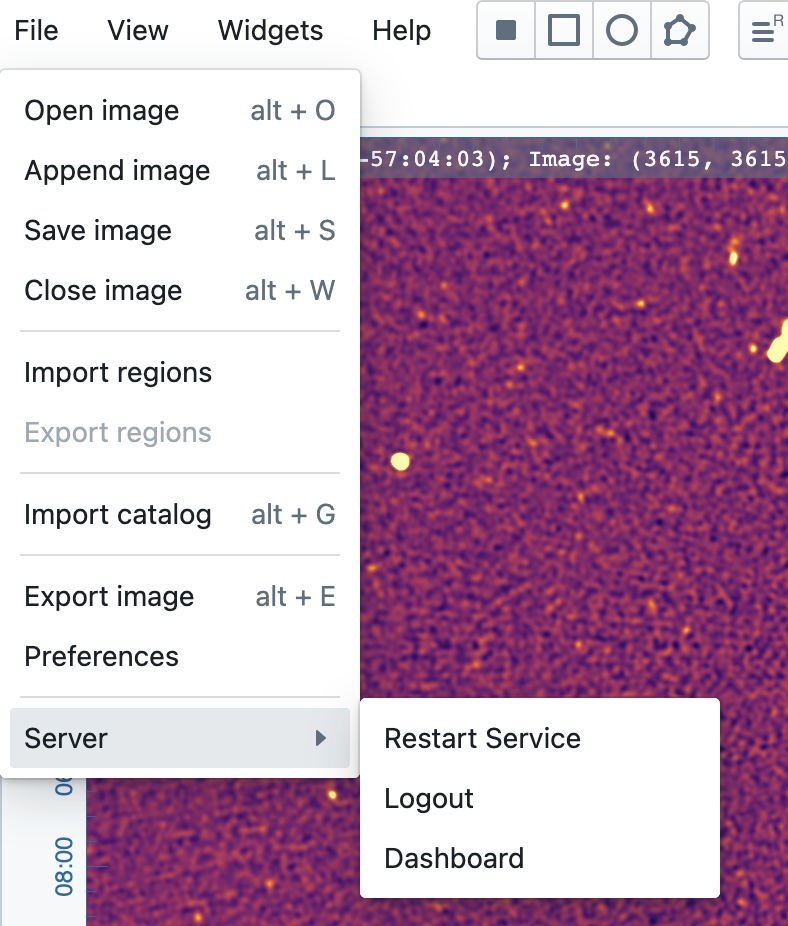
When CARTA is deployed in the “Site Deployment Mode”, a “Server” option is available in the “File” menu. With the “Server” menu, you can restart the “carta_backend” process, logout of the CARTA service, or visit the dashboard for more options.
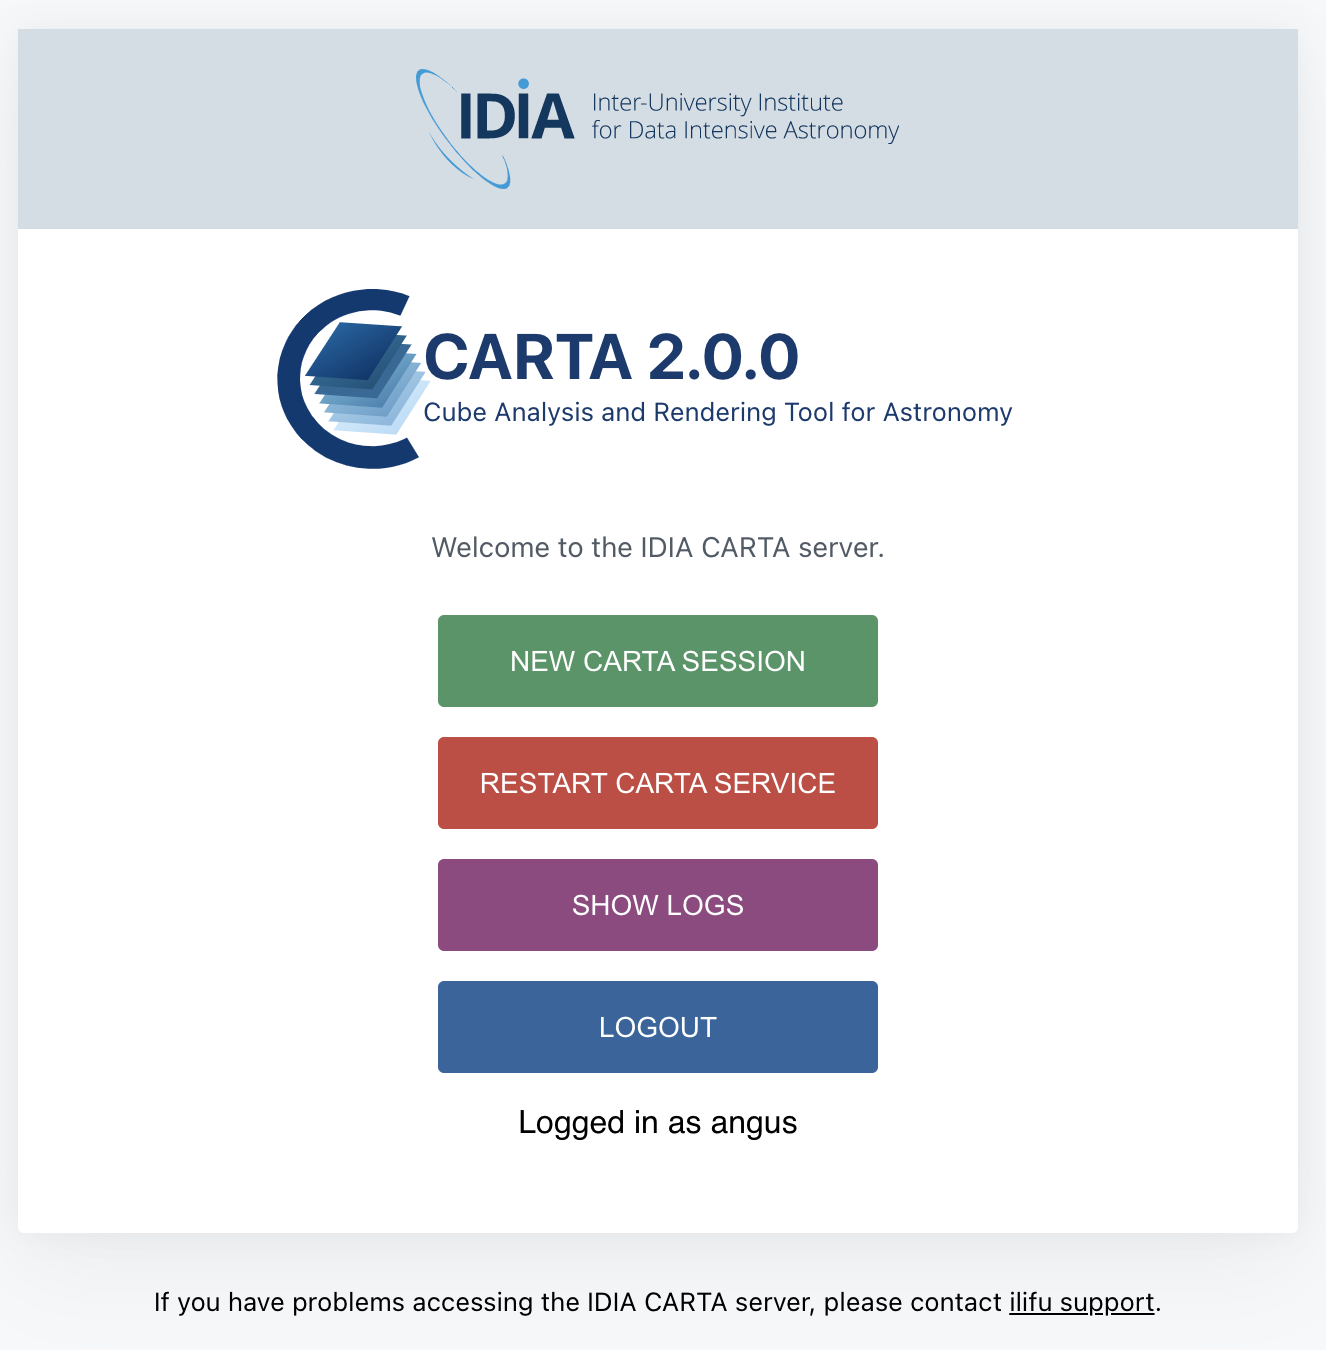
The dashboard looks like the following screenshot. With it, additionally you can request a new CARTA session as a new browser tab. Note that this new session shares the same carta_backend process with the existing sessions.
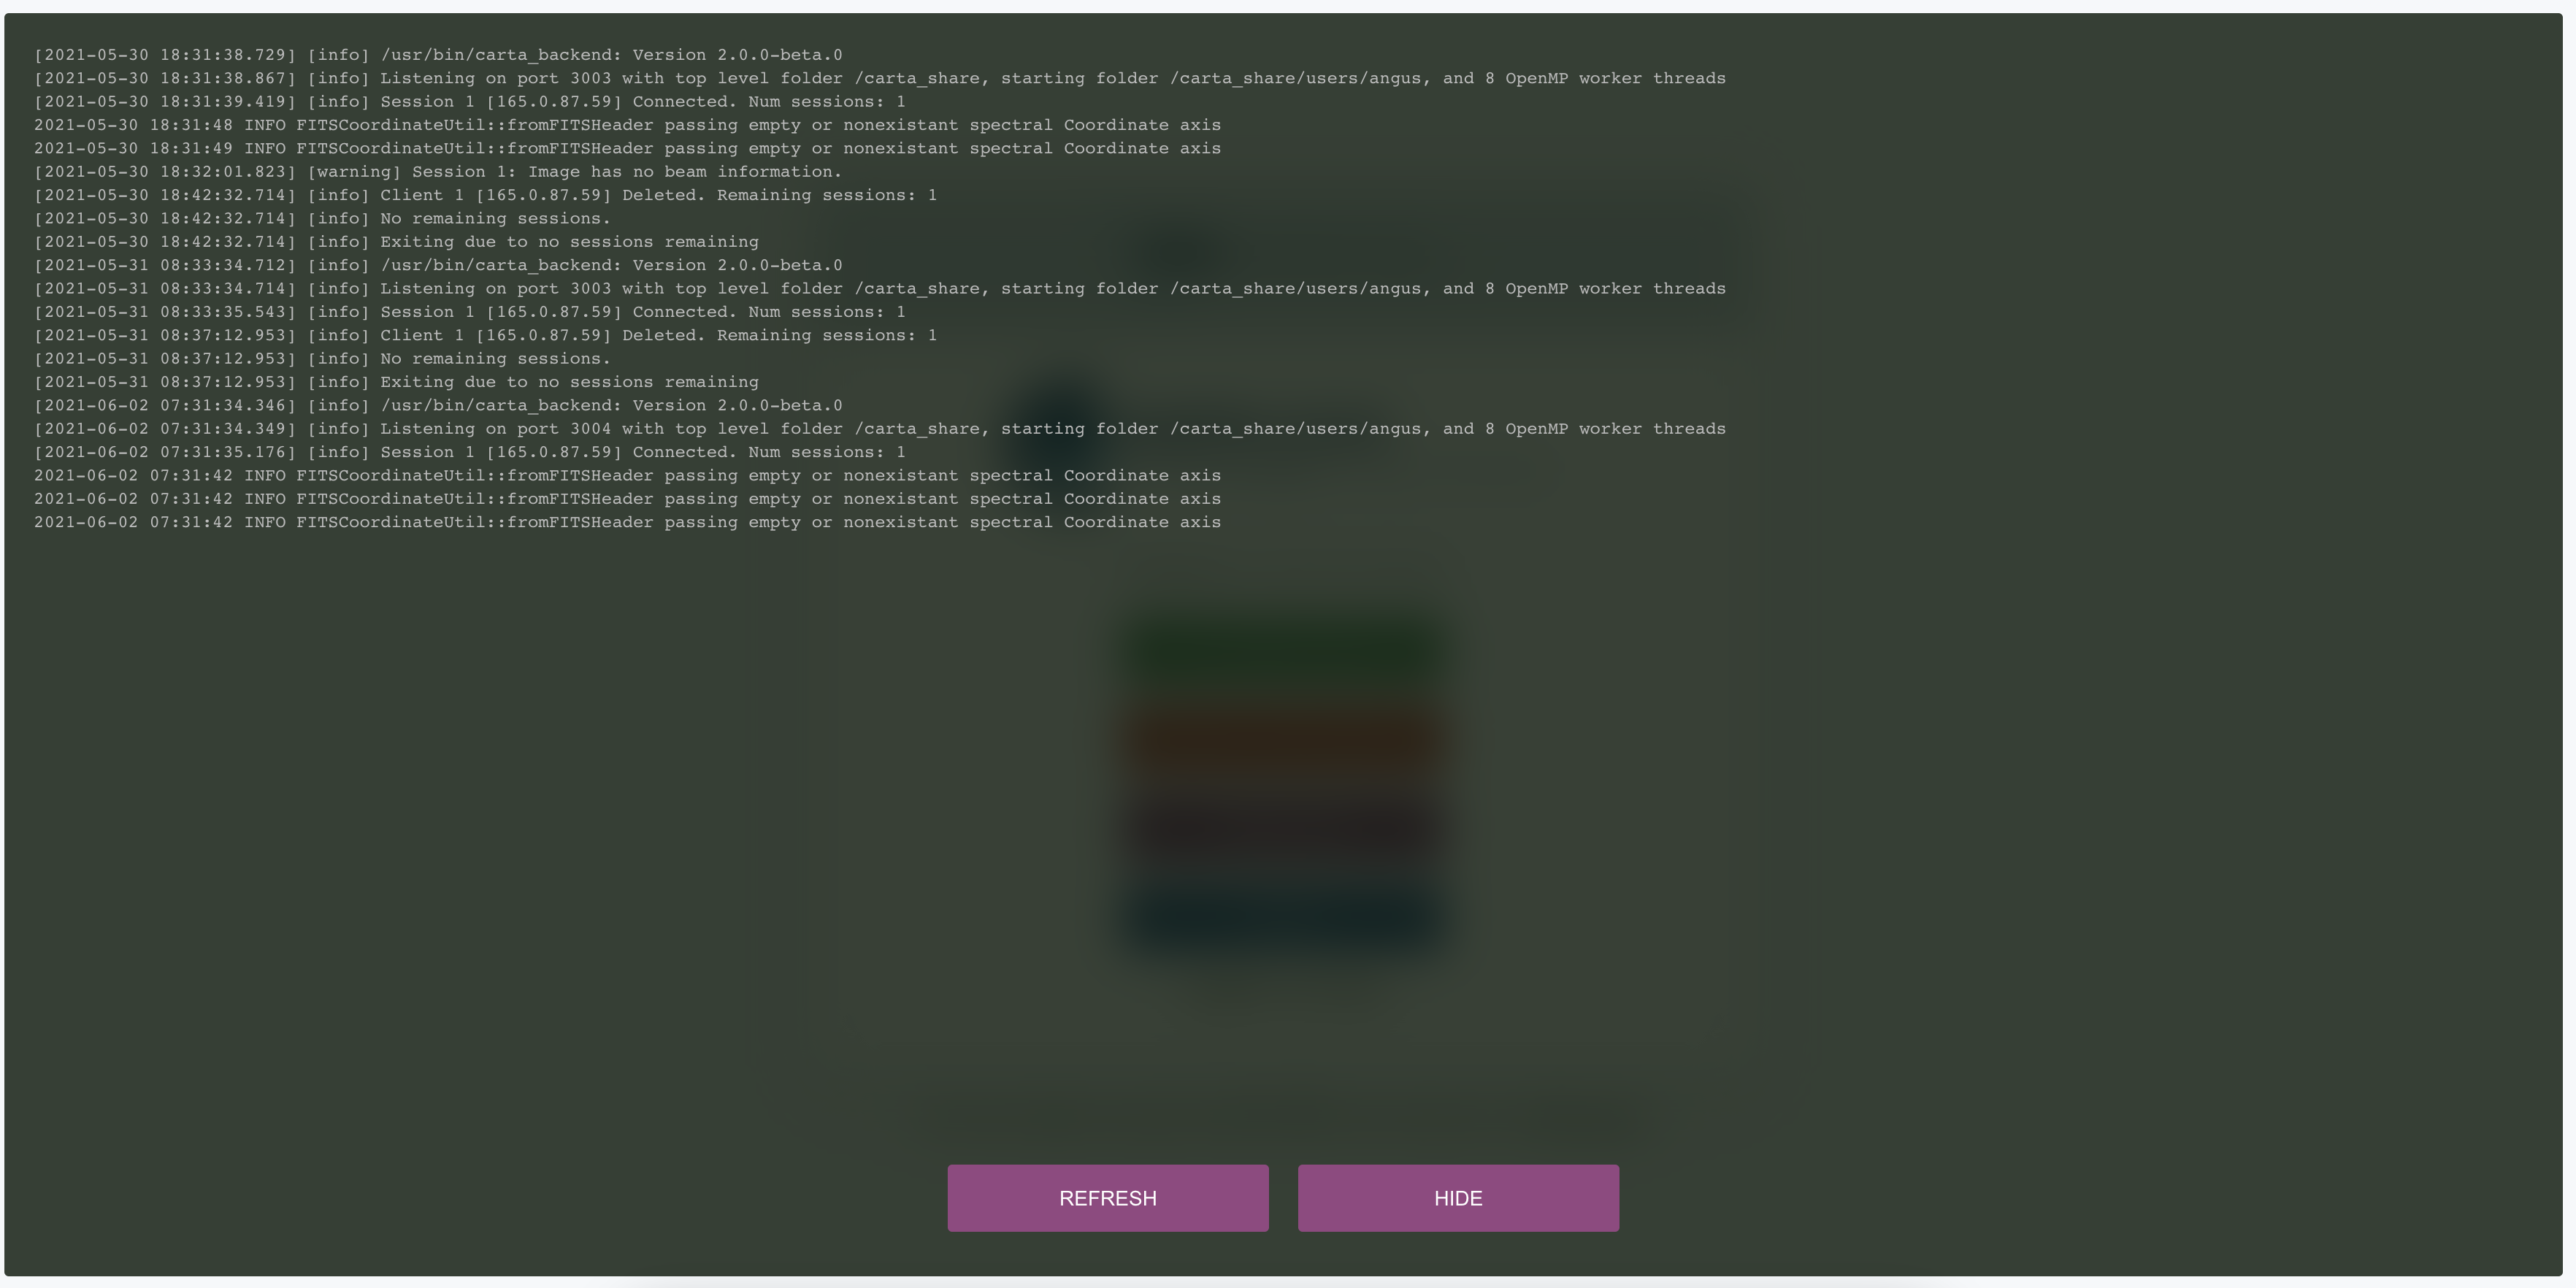
Additionally, you can view the program log via the dashboard for debugging purposes.
User Deployment Mode: running CARTA on a remote server
After you have successfully installed CARTA on a remote server via a package manager or by downloading the AppImage, you can try the following example to initialize CARTA with commandline:
# CARTA installed via a package manager (yum, apt, or brew)
carta --no_browser
# CARTA installed by downloading the AppImage
./carta-v3.0-x86_64.AppImage --no_browser
Please ensure that you have the --no_browser flag set. Then you should see something like the following in your terminal:
[2021-06-03 10:30:57.536] [info] Writing to the log file: /Users/spongebob/.carta/log/carta.log
[2021-06-03 10:30:57.537] [info] /usr/local/bin/carta_backend: Version 3.0.0
[2021-06-03 10:30:57.574] [info] Serving CARTA frontend from /usr/local/Cellar/carta-beta/3.0.0/share/carta/frontend
[2021-06-03 10:30:57.575] [info] Listening on port 3002 with top level folder /, starting folder /Users/spongebob. The number of OpenMP worker threads will be handled automatically.
[2021-06-03 10:30:57.575] [info] CARTA is accessible at http://192.168.0.128:3002/?token=E1A26527-8226-4FD5-8369-2FCD00BACEE0
The last line contains the unique URL (e.g., http://192.168.0.128:3002/?token=E1A26527-8226-4FD5-8369-2FCD00BACEE0) for you to access the CARTA process that you have just started up. You will need to copy the URL and paste it to your local web browser to initialize the CARTA GUI. Please note that by “local”, we mean the computer that you are using directly in front of you. Please do not use a web browser from the remote server to prevent potential failure due to lack of WebGL2 support.
Note
If your remote server runs a Red Hat-based distribution, a default firewall may be active that blocks access all ports (e.g., :3002). If that is the case, you can establish an SSH tunnel to bypass it. To create the tunnel and start CARTA with just one line, please run the following command on your local machine:
PORT=3333 && ssh -L ${PORT}:localhost:${PORT} <user>@<server> carta --host=localhost --port=${PORT} --no_browser
In the command above, replace <user> with your username on the remote server and <server> with the DNS or IP address of the remote server. You may also need to replace carta with the exact command you usually use to start CARTA on the remote server (e.g., perhaps you may use an AppImage version of CARTA).
PORT is the port number you wish to use for the connection. In this example we use port 3333, but you may specify any available port of your choice.
After running this command, CARTA should start on the remote server and the URL it provides should work as-is in the web browser on your local machine.
Also note, this method is intended for situations where your local machine has direct network access to the remote server (e.g., they are on the same network). It will not work if there is an intermediate gateway server. If that is the case, it is still possible SSH tunnel, but the command is more complex.
More CARTA initialization flags are available in the section CARTA initialization flags.
Warning
It is critical to have the --no_browser flag set when you launch CARTA on a remote server. If the flag is not set, CARTA will launch the default web browser on the remote server. If you have enabled X11 tunneling when you access the remote server via the ssh protocol, the web browser will be displayed in your local computer via X11. Otherwise, you will not see any browser displayed in your screen. Even the web browser from the remote server is displayed successfully with CARTA initialized, we do not recommend using CARTA in this way because the rendering is much less efficient and possibly your image will not be rendered properly due to lack of WebGL2 support.
If you would like to initialize CARTA with an image loaded in the image viewer or a folder loaded in the file browser, please try:
# CARTA installed via a package manager (yum, apt, or brew)
carta M51.fits --no_browser
carta /alma/data --no_browser
# CARTA installed by downloading the AppImage
./carta-v3.0-x86_64.AppImage M51.fits --no_browser
./carta-v3.0-x86_64.AppImage /alma/data --no_browser
User Deployment Mode: running CARTA on a local computer
After you have successfully installed CARTA on your local computer via a package manager or by downloading the AppImage, you can try the following example to initialize CARTA with the commandline:
# CARTA installed via a package manager (yum, apt, or brew)
carta
# CARTA installed by downloading the AppImage
./carta-v3.0-x86_64.AppImage
Then you should see something like the following in your terminal and the CARTA GUI initializing in your default web browser:
[2021-06-03 11:03:41.279] [info] Writing to the log file: /Users/spongebob/.carta/log/carta.log
[2021-06-03 11:03:41.280] [info] /usr/local/bin/carta_backend: Version 3.0.0
[2021-06-03 11:03:41.289] [info] Serving CARTA frontend from /usr/local/Cellar/carta-beta/3.0.0/share/carta/frontend
[2021-06-03 11:03:41.289] [info] Listening on port 3002 with top level folder /, starting folder /Users/spongebob. The number of OpenMP worker threads will be handled automatically.
[2021-06-03 11:03:41.446] [info] CARTA is accessible at http://192.168.0.128:3002/?token=C71D128D-3567-4EA1-B0F2-E703D63D8D0F
[2021-06-03 11:03:45.209] [info] Session 1 [192.168.0.128] Connected. Num sessions: 1
Your web browser is automatically launched to access the URL on the second last line. If you would like to disable this automation, please add the --no_browser flag when you launch CARTA with commandline. If you would like to have this web browser automation but with more control on browser type or brower properties, please refer to the section Browser options. More CARTA initialization flags are available in the section CARTA initialization flags.
Note
If you wish to run the AppImage inside a Docker container, or your system has FUSE disabled, please prefix with the following environment variable:
APPIMAGE_EXTRACT_AND_RUN=1 ./carta-v3.0-x86_64.AppImage
If you would like to initialize CARTA with an image loaded in the image viewer or a folder loaded in the file browser, please try:
# CARTA installed via a package manager (yum, apt, or brew)
carta M51.fits --no_browser
carta /alma/data --no_browser
# CARTA installed by downloading the AppImage
./carta-v3.0-x86_64.AppImage M51.fits --no_browser
./carta-v3.0-x86_64.AppImage /alma/data --no_browser
CARTA initialization flags
CARTA supports a set of commandline flags for initialization. Try the following to see all options:
# CARTA installed via a package manager (yum, apt, or brew)
carta --help
# CARTA installed by downloading the AppImage
./carta-v3.0-x86_64.AppImage --help
Then you should see:
Cube Analysis and Rendering Tool for Astronomy
Usage:
  carta [OPTION...] <file or folder to open>

  -h, --help                    print usage
  -v, --version                 print version
      --verbosity <level>       display verbose logging from this level
                                (default: 4)
      --no_log                  do not log output to a log file
      --log_performance         enable performance debug logs
      --log_protocol_messages   enable protocol message debug logs
      --no_frontend             disable built-in HTTP frontend interface
      --no_database             disable built-in HTTP database interface
      --no_browser              don't open the frontend URL in a browser on
                                startup
      --browser <browser>       custom browser command
      --host <interface>        only listen on the specified interface (IP
                                address or hostname)
  -p, --port <port>             manually set the HTTP and WebSocket port
                                (default: 3002 or nearest available port)
  -t, --omp_threads <threads>   manually set OpenMP thread pool count
      --top_level_folder <dir>  set top-level folder for data files
      --frontend_folder <dir>   set folder from which frontend files are
                                served
      --exit_timeout <sec>      number of seconds to stay alive after last
                                session exits
      --initial_timeout <sec>   number of seconds to stay alive at start if
                                no clients connect
      --idle_timeout <sec>      number of seconds to keep idle sessions alive
      --read_only_mode          disable write requests
      --enable_scripting        enable HTTP scripting interface
      --no_user_config          ignore user configuration file
      --no_system_config        ignore system configuration file

 Deprecated and debug options:
      --debug_no_auth      accept all incoming WebSocket connections on the
                           specified port (not secure; use with caution!)
      --threads <threads>  [deprecated] no longer supported
      --base <dir>         [deprecated] set starting folder for data files
                           (use the positional parameter instead)
      --root <dir>         [deprecated] use 'top_level_folder' instead
      --no_http            [deprecated] disable built-in HTTP frontend and
                           database interfaces (use 'no_frontend' and/or
                           'no_database' instead)

By default the CARTA backend uses the current directory as the starting data
folder, and uses the root of the filesystem (/) as the top-level data folder. If
a custom top-level folder is set with 'top_level_folder', the backend will be
restricted from accessing files outside this directory. Positional parameters
may be used to set a different starting directory or to open files on startup.

A built-in HTTP server is enabled by default. It serves the CARTA frontend and
provides an interface to the CARTA database. These features can be disabled with
'no_frontend' and 'no_database', for example if the CARTA backend is being
invoked by the CARTA controller, which manages access to the frontend and
database independently. The HTTP server also provides a scripting interface, but
this must be enabled explicitly with 'enable_scripting'.

Frontend files are served from '../share/carta/frontend' (relative to the location of the backend
executable). A custom frontend location may be specified with 'frontend_folder'.
By default the backend listens for HTTP and WebSocket connections on all
available interfaces, and automatically selects the first available port
starting from 3002. 'host' may be used to restrict the backend to a specific
interface. 'port' may be used to set a specific port or to provide a range of
allowed ports.

On startup the backend prints out a URL which can be used to launch the
frontend, and tries to open this URL in the default browser. It's possible to
disable this attempt completely with 'no_browser', or to provide a custom
browser command with 'browser'. 'no_browser' takes precedence. The custom
browser command may contain the placeholder CARTA_URL, which will be replaced by
the frontend URL. If the placeholder is omitted, the URL will be appended to the
end.

By default the number of OpenMP threads is automatically set to the detected
number of logical cores. A fixed number may be set with 'omp_threads'.

Logs are written both to the terminal and to a log file, '.carta/log/carta.log'
in the user's home directory. Logging to the file can be disabled with 'no_log'.
The log level is set with 'verbosity'. Possible log levels are:
 0   off
 1   critical
 2   error
 3   warning
 4   info
 5   debug

Performance and protocol message logging is disabled by default, but can be
enabled with 'log_performance' and 'log_protocol_messages'. 'verbosity' takes
precedence: the additional log messages will only be visible if the level is set
to 5 (debug). Performance logs are written to a separate log file,
'.carta/log/performance.log'.

The 'exit_timeout' and 'initial_timeout' options are provided to shut the
backend down automatically if it is idle (if no clients are connected).
'idle_timeout' allows the backend to kill frontend sessions that are idle (no
longer sending messages to the backend).

Enabling 'read_only_mode' prevents the backend from writing data (for example,
saving regions or generated images).

'no_user_config' and 'no_system_config' may be used to ignore the user and
global configuration files, respectively.
If you have installed the macOS Electron Desktop version and set up an alias, a few commandline options are available:
CARTA Electron desktop version
Usage:
carta []             CARTA file browser will default to the current path.
      [<path>]       CARTA file browser will default to the specified
                     path <path> e.g. carta ~/CARTA/Images
      [<image>]      CARTA will directly open the image named <image>
                     e.g. carta aJ.fits or carta ~/CARTA/Images/aJ.fits
      --help         View this help output.
      --debug        Open the DevTools in the Electron window.
Browser options
A new option has been added to the CARTA backend executable which allows you to specify a custom browser command for CARTA to use to launch the frontend automatically. This option is still under development and has certain temporary limitations. We provide some examples below to demonstrate how it can be used.
The option is provided as an arbitrary string which includes a browser executable name as well as any custom flags that you would like to pass to the browser. The special placeholder CARTA_URL will be replaced by CARTA by the frontend URL, complete with the security token. It’s only necessary to add this if there is something that you need to add after the URL – otherwise you can leave it out and it will be appended to the end.
This command string can be passed to the carta executable as a commandline argument (--browser), or written permanently to a configuration file, or even used to create a custom launcher for your GUI environment. If your command contains spaces, please make sure that you quote it.
Commandline examples:
Chrome on Linux (select the correct executable name):
--browser="google-chrome --app=CARTA_URL --new-window&"
--browser="chrome --app=CARTA_URL --new-window&"
--browser="chromium-browser --app=CARTA_URL --new-window&"
Firefox on Linux:
--browser="firefox -new-tab"
--browser="firefox -new-window"
macOS:
--browser="open -a firefox"
--browser="open -a Google\ Chrome"
--browser="open -n -a Google\ Chrome --args --app=CARTA_URL --new-window"
Log and configuration files
For users who installed CARTA in the “User Deployment Mode”, a set of configuration files are created in the ~/.carta folder after you have run CARTA once. You should see that two folders are created:
- config: configuration files including preferences and layouts
- log: backend log named as “carta.log”
The preferences and layout files are in the JSON format. The “preferences.json” file allows you to set up the preferences programmatically. A full set of options is available in Appendix D: preferences schema. The layout folder contains all the custom layouts that you have created.
Installation of fits2idia
CARTA provides a commandline tool “fits2idia” for you to convert a FITS image to the HDF5 (IDIA schema) format which helps to improve the user experience of image visualization and analysis significantly, especially for large image cubes.
Installation via package managers
Ubuntu
The Ubuntu 18.04, 20.04, and 22.04 packages are available from our PPA. Please note that root access is required, unless you install in a Docker container.
sudo add-apt-repository ppa:cartavis-team/carta
sudo apt-get update
sudo apt install fits2idia
CentOS 7
The “fits2idia” program is available from the “cartavis/carta Copr” repository and requires packages from the “EPEL” repository.
sudo yum -y install yum-plugin-copr
sudo yum -y copr enable cartavis/carta
sudo yum -y install epel-release
sudo yum -y install fits2idia
AlmaLinux 8 / Rocky Linux 8
The “fits2idia” program is available from the “cartavis/carta Copr” repository and requires packages from the “EPEL” repository.
sudo dnf -y install 'dnf-command(copr)'
sudo dnf -y copr enable cartavis/carta
sudo dnf -y install epel-release
sudo dnf -y install fits2idia
Red Hat Enterprise Linux 7
The “fits2idia” program is available from the “cartavis/carta Copr” repository and requires packages from the “EPEL” repository.
sudo bash -c 'echo -e "\
[copr:copr.fedorainfracloud.org:cartavis:carta]\n\
name=Copr repo for carta owned by cartavis\n\
baseurl=https://download.copr.fedorainfracloud.org/results/cartavis/carta/epel-7-x86_64/\n\
type=rpm-md\n\
skip_if_unavailable=True\n\
gpgcheck=1\n\
gpgkey=https://download.copr.fedorainfracloud.org/results/cartavis/carta/pubkey.gpg\n\
repo_gpgcheck=0\n\
enabled=1\n\
enabled_metadata=1" > /etc/yum.repos.d/carta.repo'
sudo rpm -ivh https://dl.fedoraproject.org/pub/epel/epel-release-latest-7.noarch.rpm
sudo yum -y install fits2idia
Red Hat Enterprise Linux 8
The “fits2idia” program is available from the “cartavis/carta Copr” repository and requires packages from the “EPEL” repository.
sudo dnf -y install 'dnf-command(copr)'
sudo dnf -y copr enable cartavis/carta
sudo rpm -ivh https://dl.fedoraproject.org/pub/epel/epel-release-latest-8.noarch.rpm
sudo dnf -y install fits2idia
macOS
The “fits2idia” program can be installed via “homebrew” on macOS 11 (BigSur) and macOS 12 (Monterey). To install Homebrew, if not already installed:
/bin/bash -c "$(curl -fsSL https://raw.githubusercontent.com/Homebrew/install/HEAD/install.sh)"
Then, “fits2idia” can be simply be installed with:
brew install cartavis/tap/fits2idia
Other installation methods
If you do not have “su” or “root” privilege to install “fits2idia” via package managers, you can consider the following alternatives.
Linux AppImage
For Linux users (Ubuntu/RedHat) without root access, an AppImage version of “fits2idia” may be used.
For x86_64 architectures:
wget https://github.com/CARTAvis/fits2idia/releases/download/v0.1.15/fits2idia.AppImage.x86_64.tgz
tar -xvf fits2idia.AppImage.x86_64.tgz
For aarch64 architectures:
wget https://github.com/CARTAvis/fits2idia/releases/download/v0.1.15/fits2idia.AppImage.aarch64.tgz
tar -xvf fits2idia.AppImage.aarch64.tgz
For easier access, an ‘alias’ may be set up for running it.
macOS
For macOS users who do not wish to use Homebrew, we have bundled the “fits2idia” program with the CARTA v3.0.0 Electron version for convenience. We recommend setting up an alias to use it.
Assuming you already have the CARTA v3.0.0 Electron version installed in the default location, you can create an alias to the ‘fit2idia’ executable. In your macOS terminal, open your “~/.zshrc” file (or “~/.bashrc” if you use bash) in a text editor and add the following line:
alias fits2idia='/Applications/CARTA.app/Contents/Resources/app/carta-backend/bin/fits2idia'
Then, rither source ~/.zshrc` (or source ~/.bashrc) or open a new tab or terminal window to use “fits2idia”.
Windows
While we do not provide official support for CARTA on Windows, you can still use it through the Windows Subsystem for Linux 2 (WSL2), with Ubuntu being the recommended Linux distribution. The following steps provide a simplified guide to installing it on Windows 11, although the method should be fairly similar for Windows 10 users:
Open the Microsoft store and search for “Ubuntu”.
Click “Get”.
It will proceed to install Ubuntu through the Windows Subsystem for Linux.
Click “Open”.
An Ubuntu terminal will appear.
An Ubuntu icon will also appear in the Start menu for easy access in future.
Install the Ubuntu version of CARTA into the terminal.
In the Ubuntu terminal type the following:
sudo add-apt-repository ppa:cartavis-team/carta(password is your Windows login password)
Press ENTER
sudo apt-get update
sudo apt install carta
Press Y.
CARTA is now installed.
To run CARTA: In the Ubuntu terminal type:
carta /mnt/c/Users/<USERNAME> -–no_browserWhere <USERNAME> is your windows username.
The –no_browser flag suppresses it from trying to open a web-browser in Ubuntu as we strongly recommend using your local Windows web browser for best performance.
CARTA will start up and will say “CARTA is accessible at” followed by a unique URL.
Copy that unique URL, and paste it into your local Windows web browser (such as Google Chrome, Firefox, or Edge).
The CARTA GUI should appear and the file browser will open in your Windows home directory so you can easily navigate to your images.
Troubleshooting
In this section, we provide common issues users have experienced so far and provide solutions. If none of the solutions work, please do contact CARTA Helpdesk for help.
I see images are not rendered in the image viewer.
(common) CARTA utilizes GPU-accelerated rendering techniques at the client side for image rendering. “WebGL2” support is required for Google Chrome, Firefox, and Safari web browsers. You can visit https://webglreport.com/?v=2 to see if your browser supports WebGL2. If WebGL1 (https://webglreport.com/?v=1) and WebGL2 are not supported by your browser, try one of the other ones listed above.
If you see WebGL1 is supported but not WebGL2, please check your hardware to see if there is a discrete NVIDIA GPU. If so, please check the GPU driver version. There are open-source drivers and official NVIDIA proprietary drivers. If you are using the official NVIDIA proprietary drivers and experience the issue with WebGL2, there are open-source NVIDIA drivers available for ‘Turing’ or later NVIDIA GPUs (https://github.com/NVIDIA/open-gpu-kernel-modules)) that you could try instead, or vice versa.
(common) CARTA uses GPU to render the image in the image viewer. If you are running CARTA remotely through a VNC window, the image may fail to render correctly leading to a blank image. In this case we recommend to use
--no_browserflag to launch CARTA at the remote server and use your local web browser to access the URL shown in your terminal. Please refer to the section User Deployment Mode: running CARTA on a remote server.(less common) Check your browser version. It needs to support “wasm” streaming and be enabled. More information about browser support of WebAssembly can be found at https://caniuse.com/#search=WebAssembly.
Some outdated RedHat7 distributions may have Firefox 52 ESR which although having WebAssembly support, it is deactivated by default. We recommend updating to a newer version of Firefox “sudo yum update firefox” or installing Google Chrome. If you can not update Firefox, you can try activating WebAssembly as follows:
- Open a new tab and enter “about:config” in the URL bar.
- A warning message will appear. Click the button to continue.
- In the search box enter “wasm” and the list will filter down to a few results.
- Double click each line related to “javascript.options.wasm” so that the “Value” column shows them as “true”.
- Then simply close the “about:config” tab and the CARTA frontend should now load properly.
As for the Chrome browser, WebAssembly support was introduced in Chrome version 51, but versions 51 to 56 have it deactivated by default. To activate WebAssembly in Chrome 51 to 56 enter “chrome://flags” in the URL bar, type WebAssembly in the search box that appears, and change each WebAssembly option to “Enabled”. If you have Chrome version 57 or newer, WebAssembly should be activated by default.
The RedHat7 AppImage does not open and it prints a message suggesting to extract the AppImage using the
--appimage-extractflag.This error is due to lack of FUSE (File System in Userspace) support. FUSE support in RedHat7 systems may be disabled in some institute environments for security reasons. If that is the case, please prefix with the
APPIMAGE_EXTRACT_AND_RUN=1environment variable. i.e.APPIMAGE_EXTRACT_AND_RUN=1 ./carta-v3.0-x86_64.AppImageThere are error messages when I try to install CARTA using Homebrew
There could be various problems such as “dyld: Library not loaded” due to “libgrpc++.1.37.dylib” or “libprotobuf.26.dylib”, for example. If you encounter similar errors, please try the following:
brew update
brew remove cartavis/tap/carta
brew install cartavis/tap/carta
Or,
brew remove cartavis/tap/carta-beta
brew --build-from-source cartavis/tap/carta-beta
If the error mentions that “homebrew-core is a shallow clone”. please try as it suggests:
git -C /usr/local/Homebrew/Library/Taps/homebrew/homebrew-core fetch --unshallow
git -C /usr/local/Homebrew/Library/Taps/homebrew/homebrew-cask fetch --unshallow

brew uninstall cartavis/tap/carta
brew install cartavis/tap/carta